Dynaplug AIR Tubeless Bicycle Tire Puncture Repair Tool
Last year I purchased my first brand new bike in over 20 years. It came with tubeless tires, already prepped by the mechanics at the warehouse. It’s been a dream to ride … 65psi on 28’s … plush and comfy, and every so I often I find a little white dot on the tire; dried sealant that has done it’s one and only job. Having become comfortable and confident setting up tubeless wheels, the next study was to become comfortable and confident should the inevitable issue happens: a flat, with a puncture that doesn’t want to seal easily on its own.
Several weeks ago, I began a journey to master and become confident with tubeless wheels and tires. I posted a couple “help wanted” threads in the Triathlon Forum, one which gained a little traction, called Wisdom from the tubeless pros. (By the way, thanks to all of you who responded with your gems of wisdom.) I then spent the better part of last Saturday performing dry runs on a new tubeless-ready rear disc wheel. Dry run meaning I practiced mounting the tire, seating the bead and checking for air leaks without any sealant. Once I was confident and comfortable, I added the sealant and, just like that – we were holding air and sealant, baby!
But, that wasn’t enough. See, the only thing I get nervous about before, and during, racing – right up until I rack the bike in T2 – is that I’ll wake up to find I have a flat tire when I arrive at T1 at 4:30 am. Or, even worse, I find myself on the side of the road during the bike leg, in full panic mode, making rookie mistakes as I perform that somewhat routine task of taking care of a flat. So, with that in mind, I reached out to two well known companies for some advice. Here’s a video from Zipp that provides some insight that will help all of us fix a tubeless flat.
Dynaplug Air
The other company I reached out to was Dynaplug, who provided some information about a kit that can both plug and “air up” a flat tire.
The kit is available with or without CO2’s and comes in a MTB, Mega and Road versions, which determine the length of the insertion tube. I purchased the Road version directly from Dynaplug online for $69.99 + a reasonable shipping charge.
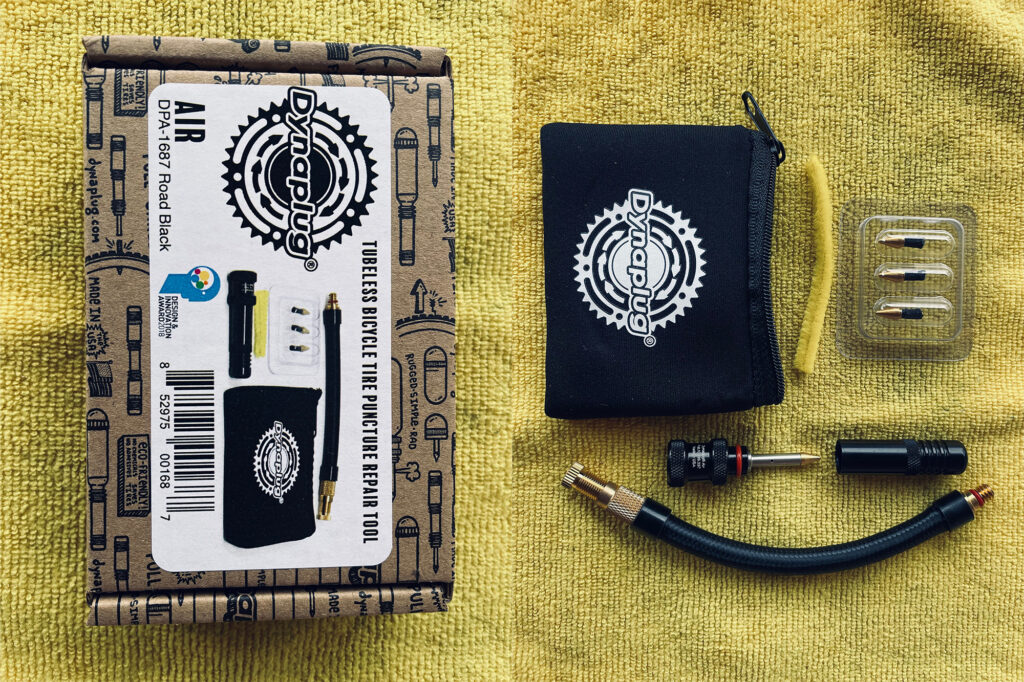
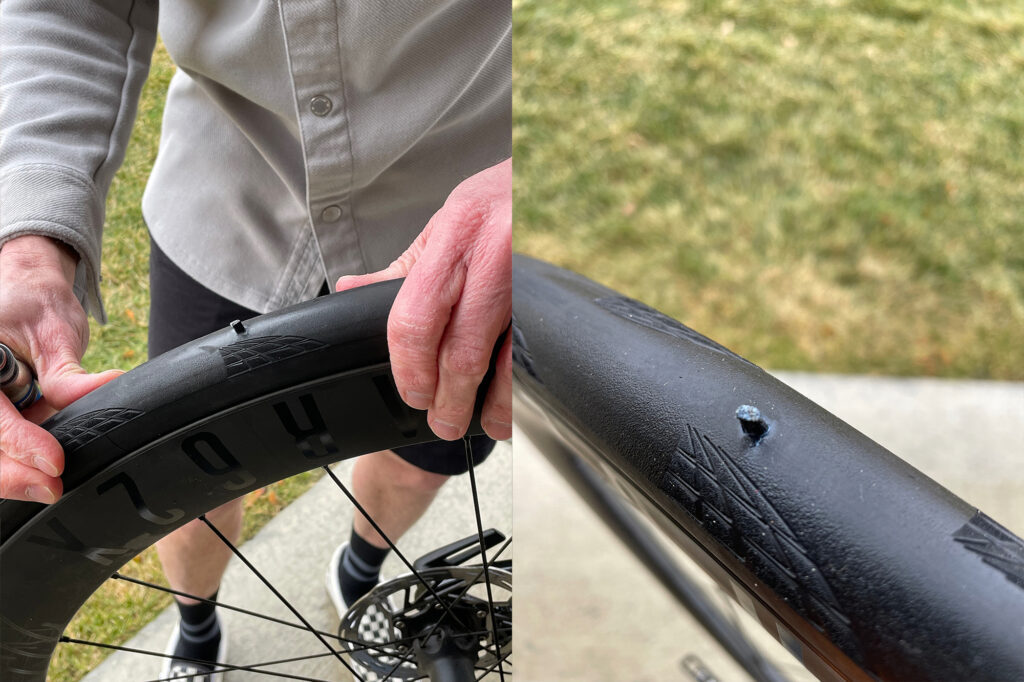
Photos: Sophie Horne
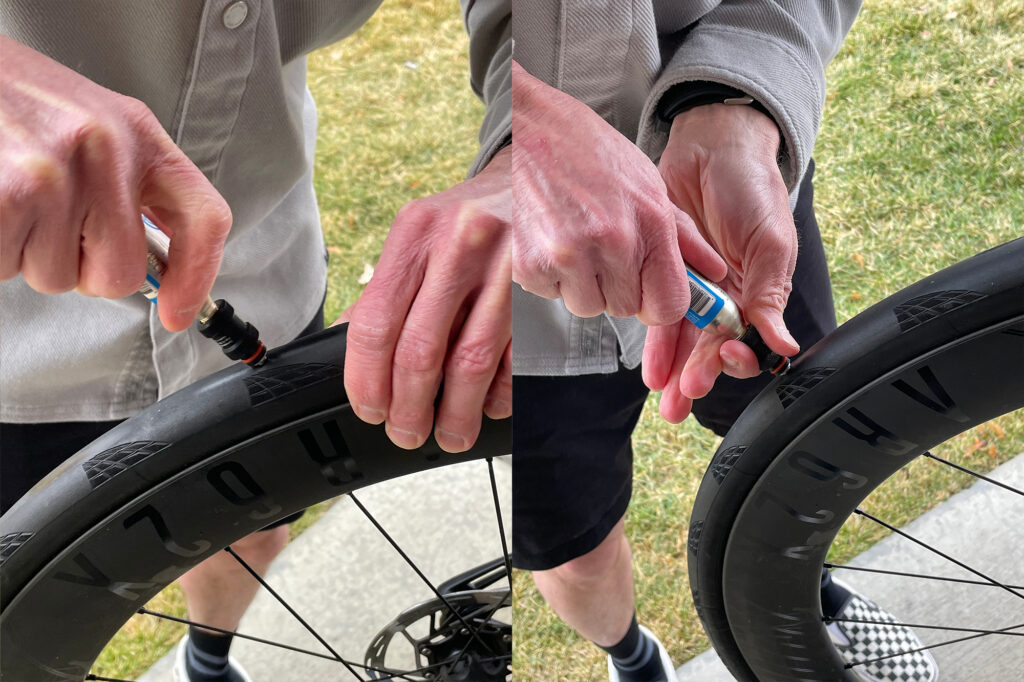
The road kit includes a loaded insertion tool, three spare plugs, the tool + inflator chuck + valve core remover, a small pipe cleaner for cleaning your tool, a short CO2 hose to fill through the valve stem and a little zipper pouch to keep everything where it belongs when you store it on (or in) your bike.
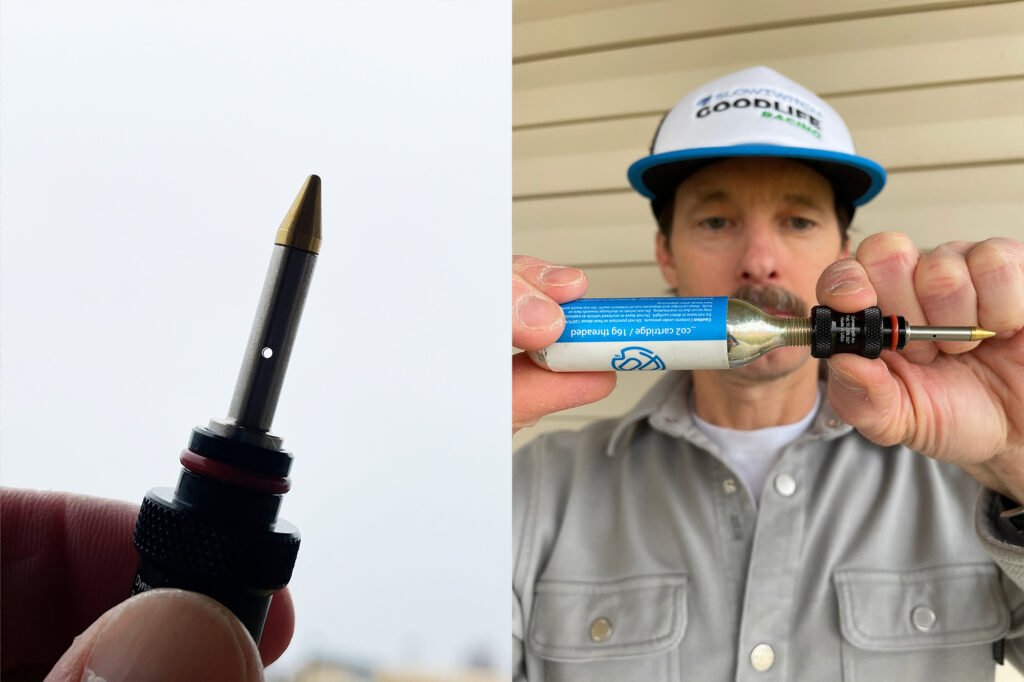
One word of Caution: have a glove or small rag handy if possible to hold the chuck near the CO2. (I may have a little freezer burn on my thumb and index finger from grabbing the money shots below.)
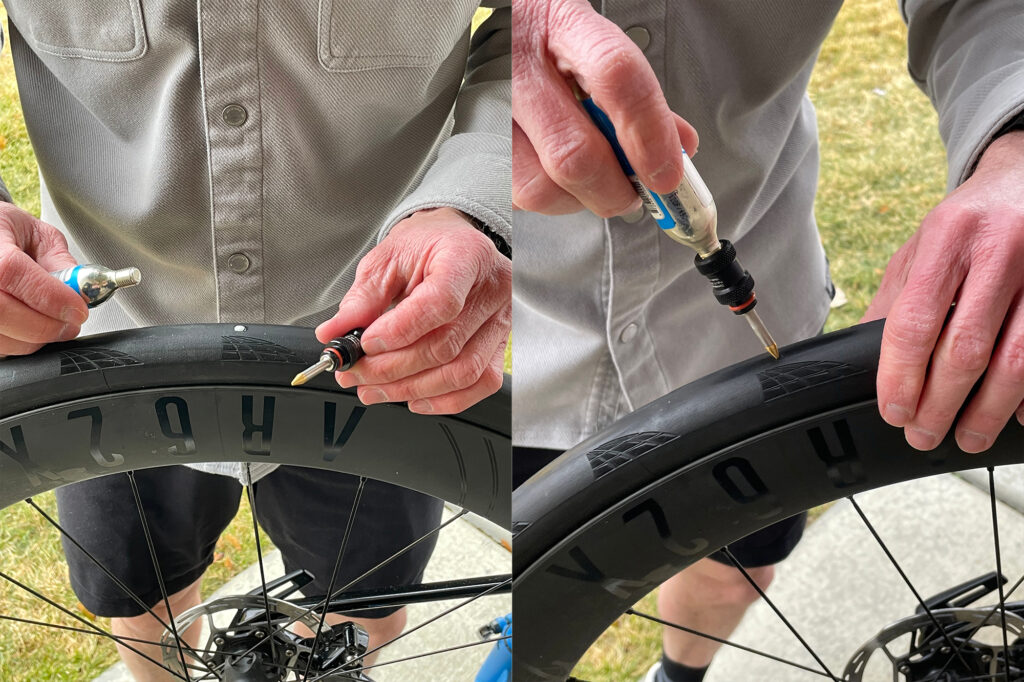
The Dynaplug AIR worked flawlessly on the first try – it was simple to figure out and use and has given me confidence to go “full send” into the world of tubeless wheels for training and racing.


As an added bonus, if your valve stem is ever plugged up, just jab one of these in and direct inflate!
A little jest, but I did once have that issue where I plugged the wheel and then wasted what felt like half the C02 on a plugged valve.
While we’re on the subject of tubeless and plugging the wheel. When is the best time to pull over and plug? In Taupo, I had a leak that was spraying sealant, and when I pulled over the tire still had such good pressure that it was actually too hard to get the plug jammed in. I know dynaplug gives you a little stabbing tool to enlarge the hole, but I just couldn’t bring myself to make the hole in the tire bigger… should I have just used that? Or do you ride on the spraying wheel for a couple more minutes and see if it will seal up on it’s own?
As it turned out, while getting all my tools out to plug the hole, I rotated the wheel so the hole/sealant was facing down and it stopped leaking anyway. When I tried to plug it, I couldnt errr… get penetration so I kept riding anyway.
…that hole, in the pictures above, is from late fall just before we started getting snow. Again, I’m fairly new to tubeless, noticed the slight spraying of sealant and then it stopped. I assumed all was well, but a couple days later found the tire completely deflated and the bead had unseated. The weather was decent and I was amp’d to get outside one more time. Couldn’t get it to re-seat no matter what I did so I pulled the tire off, wiped with a rag, and threw in a tube. Having just picked up a new rear disc, I told myself it was time to start figuring it out. The pictures above are me fixing that same tire over the weekend, from that late Fall ride. Long story short…in a race setting I would’ve plugged it immediately, to keep my HR down!
As soon as you can - you want to keep as much sealant in to help fix. Also it’s a pain to clean. So stop, put a finger over the hole whilst you are getting the dynaplug out, stab the hole, and don’t worry about enlarging the hole - the plug is going to make the same size hole regardless, and the more distance to the rim, the better as you’re less likely to end up pressing the tip into the rim tape.
I think this is the continuation of my comment on that last thread - there is a huge debate about what tyres to go for, but really there needs to be as much on what tools and how to ‘fix’ with tubeless when people make the switch. Learning all this stuff as it happens by the side of the road is a recipe for sad faces.
That said, I’m interested but not convinced by the dynaplug air. Sort of makes sense, but I like the smaller dynaplug (racer) and separate CO2.
And the other observation is you do need to check a sealed fix (with or without plug). Some can be permanent, but some are more ‘get you home’ and then you need to put a patch on the inside of the tyre for permanent. Another mistake I made was what you did, see a sealed puncture, think that was great, and then of course it failed and turned into a puncture needing a plug (and then new tyre) half way round the next ride.
I once came back to my bike on a multi day trip and found I had a flat. I was shocked the tire went flat as when I parked the bike everything was fine. Turns out that I picked up a tiny animal tooth in the literal last meters of me ride. To add insult to injury, I parked the bike directly on the tooth which leaked out all of me tubeless sealant. Word to the wise- check the condition of your bike when you park it!